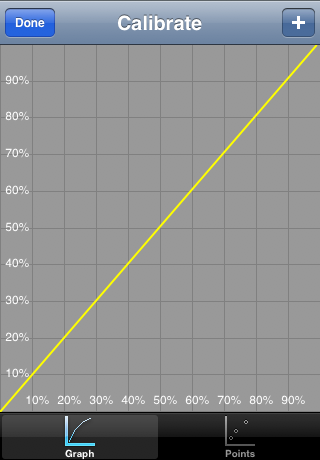
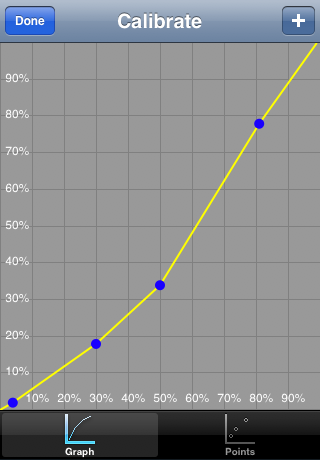
When you first start the app, there are no points defined, and the default is used. The brightness values correspond the the VLT forming a straight line. The brightness of an LCD screen is not always linear, and is often a logarithmic curve compared to the actual VLT. You will need a known reference tint in order to calibrate. Window tint film varies by manufacturer, so they may not be as accurate. If you can use a certified reference sample that would produce the best results.
(Click on any image on this page to view larger)
Adding New Points
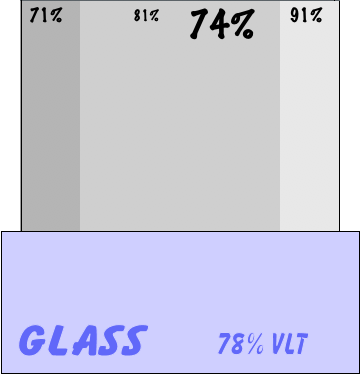
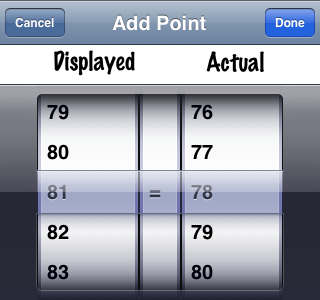
The reference tint used here is 78% VLT. Note that the display reads 74% with the brightness reading of 81%. This is due to previous values entered. To add a new point, select the '+' on the menu bar. This will bring up the add view. Choose the Displayed value of 81, and the Actual value to 78, and select Done.
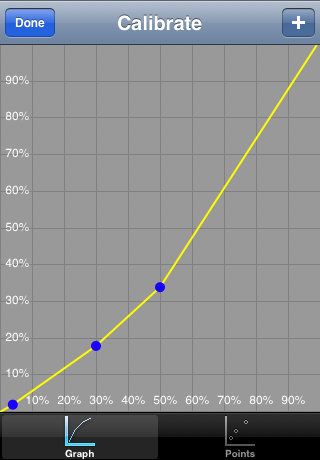
With the new point, the curve will be adjusted. You can display the point values by choosing the Point tab on the bottom. This will allow you to edit or delete points.
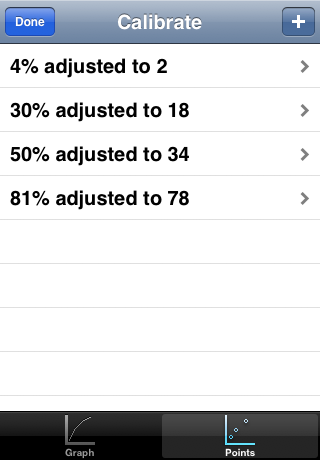
Editing or Deleting Points
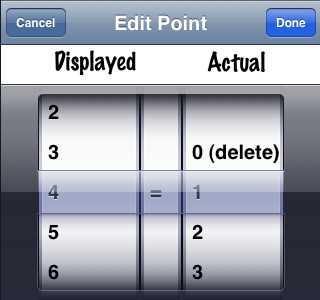
To delete an entry, set the Actual Value to zero, and press Done. You can edit both the displayed value or the adjusted value. If you cancel, the original value will be restored.Summary
Because the calibration is very important to get accurate readings, you may want to have someone else interpret the values as verification of your own. You may also want to try different times of the day, or under different lighting conditions. With a little practice, you will be able to use the app effectively.